
Silver Foil on White Paper: A Comprehensive Guide
Introduction to Silver Foil on White Paper
![]()
Silver foil on white paper has become increasingly popular in various applications, from packaging and printing to crafts and art projects. In this comprehensive guide, we will explore the world of silver foil on white paper, its benefits, and how it differs from other methods of achieving metallic finishes.
What is silver foil and its applications on paper?
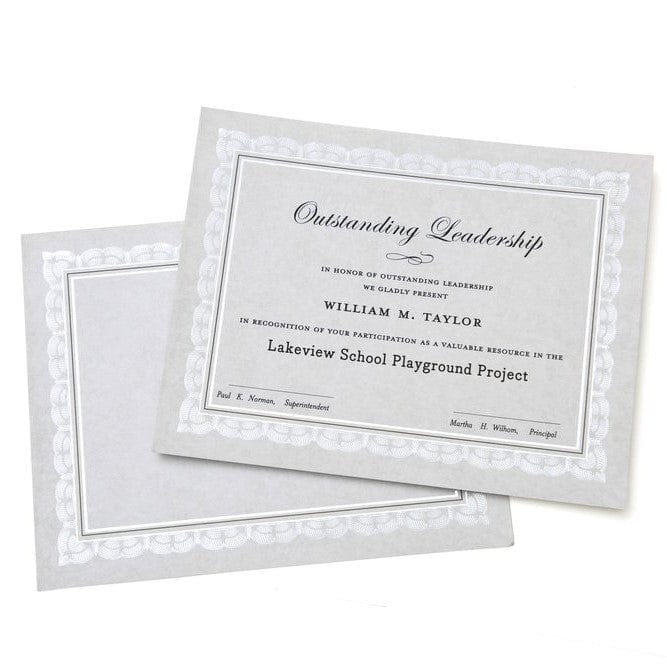
Silver foil is a thin metallic sheet that can be applied to paper using a hot stamping press and a custom metal die. This process, known as foil stamping, allows for a similar tangible impression as letterpress printing, creating an elegant and luxurious look. Silver foil can be applied to any paper type or color, but it stands out especially well on white paper due to its high contrast.
Benefits of using silver foil on white paper
Using silver foil on white paper comes with several benefits. Firstly, silver foil gives a more authentic metallic look compared to metallic inks. It has a reflective quality that adds depth and dimension to designs. Secondly, silver foil is completely opaque, making it ideal for printing lighter colors on colored papers. This is especially useful when you want to achieve bright and vibrant colors on darker backgrounds. Additionally, silver foil can be combined with other printing techniques like letterpress or digital printing to create unique and eye-catching designs.
Differences between metallic foils and inks
While metallic inks can also create a metallic effect, they do not provide the same level of shine and reflectivity as metallic foils. Metallic foils, like silver foil, have a more pronounced and authentic metallic appearance. Furthermore, metallic inks may show differently on different paper types, while metallic foils consistently produce the desired effect. It’s worth noting that each foil color requires its own copper plate, which may incur an additional charge.
Silver foil on white paper offers an elegant and sophisticated look that can enhance various projects. In the following sections of this guide, we will delve deeper into the techniques and tips for working with silver foil, as well as explore creative uses and design ideas for incorporating silver foil on white paper. Stay tuned for more inspiration and insights!
Techniques and Tips for Working with Silver Foil on White Paper

Silver foil adds a touch of elegance and sophistication to any project. Whether you’re creating wedding invitations, business cards, or art prints, working with silver foil on white paper requires some specific techniques and know-how to achieve the best results. In this section, we will explore the essential tools and materials needed for applying silver foil, provide a step-by-step guide on how to apply it, and share tips for achieving the desired outcome.
Essential Tools and Materials for Applying Silver Foil on White Paper
Before getting started with applying silver foil on white paper, it’s important to gather all the necessary tools and materials. Here’s a list of what you’ll need:
![]()
- Foil: Choose a high-quality silver foil that is suitable for the project. Consider the thickness and finish of the foil to ensure it meets your requirements.
- Adhesive: Use a heat-activated adhesive specifically designed for foil stamping. This adhesive will adhere the foil to the paper when heat is applied.
- Heat Source: A hot foil stamping machine or a heat transfer machine is needed to apply the heat and pressure required for the foil to adhere to the paper.
- Dies: Custom-made dies or plates are used to create the design or pattern that will be stamped with foil. These dies can be made from magnesium, copper, or brass.
- White Paper: Choose a smooth and high-quality white paper that is compatible with the foil adhesive and heat transfer process.
- Cutting Tools: Scissors or a paper cutter will be needed to trim the foil to the desired size.
- Clean Cloth or Brush: A soft cloth or brush is used to remove any excess foil after the stamping process.
Step-by-Step Guide on How to Apply Silver Foil
Now that you have all the necessary tools and materials, here is a step-by-step guide on how to apply silver foil on white paper:
- Prepare the Design: Create or select the design that you want to foil stamp on the white paper. Ensure that it is in the correct format and size for the foil stamping process.
- Set Up the Stamping Machine: If you’re using a hot foil stamping machine, follow the manufacturer’s instructions to set it up. Adjust the temperature, pressure, and timing settings according to the type of foil and paper you’re using.
- Prepare the Foil: Cut the silver foil to the desired size, ensuring it covers the area you want to foil stamp.
- Apply the Adhesive: Using a brush or adhesive applicator, apply a thin and even layer of adhesive to the area where you want the foil to adhere. Be careful not to apply too much adhesive, as it may result in smudging or uneven foiling.
- Place the Foil: Carefully place the cut foil onto the adhesive-coated area, ensuring it aligns perfectly with the design. Gently press down to secure the foil in place.
- Heat and Transfer: Place the white paper with the foil and adhesive in the hot foil stamping machine. Close the machine and apply heat and pressure according to the manufacturer’s instructions. This will transfer the foil onto the paper.
- Remove Excess Foil: Once the stamping process is complete, open the machine and carefully remove the white paper with the foil. Use a clean cloth or brush to gently remove any excess foil, revealing the beautifully stamped design.
Tips for Achieving Desired Results with Silver Foil
To ensure that your silver foil on white paper projects turn out stunningly, here are some tips to keep in mind:
- Test and Practice: Before working on the final project, conduct a few tests on similar paper and foil to familiarize yourself with the process and achieve the desired results.
- Control the Heat and Pressure: Adjust the temperature and pressure settings on your hot foil stamping machine to achieve the best results. Too much heat or pressure can cause the foil to over-adhere or smudge.
- Use the Right Paper: Choose a smooth and high-quality white paper that is suitable for foil stamping. Paper with a coating may not work well with the adhesive, so opt for uncoated or textured paper for best results.
- Avoid Overlapping Foil: Be careful not to overlap the foil during the stamping process, as it may cause smudging or uneven coverage. Apply the foil precisely to the intended areas only.
- Clean the Dies: Regularly clean the custom-made dies or plates to remove any adhesive residue or debris. This will ensure crisp and clear foil stamping.
- Practice Patience: Give the foil ample time to cool down and bond with the paper before removing any excess foil or handling the finished project. Rushing this step may result in damaged foil or imperfect results.
By following these techniques and tips for working with silver foil on white paper, you’ll be able to create stunning and professionally finished projects that will impress and delight. So, gather your tools, unleash your creativity, and enjoy the magic of silver foil on white paper.
Creative Uses and Design Ideas for Silver Foil on White Paper
Silver foil on white paper offers countless design possibilities and can add a touch of elegance and sophistication to various projects. Whether you’re working on crafts, art projects, or printing materials, here are some creative ways to incorporate silver foil and enhance the visual appeal of your white paper projects.
Design Inspiration and Ideas
When it comes to using silver foil on white paper, the possibilities are endless. Here are some design inspiration and ideas to get your creative juices flowing:
- Wedding Invitations: Create stunning wedding invitations by adding silver foil accents to the text, borders, or graphics. The silver foil will give your invitations a luxurious and elegant look, setting the tone for a memorable celebration.
- Greeting Cards: Make your greeting cards stand out by using silver foil to highlight specific elements such as text, images, or borders. The shimmering effect of the foil will add an extra touch of charm and make your cards truly special.
- Art Prints: Add a touch of sophistication to your art prints by incorporating silver foil. Choose specific elements in your artwork that you want to highlight, and use silver foil to give them a reflective and eye-catching effect.
- Business Cards: Create unique and memorable business cards by incorporating silver foil into your design. Whether it’s adding a silver foil logo or using foil accents to highlight important information, the metallic shine will make your business cards stand out from the rest.
- Packaging Design: Make your product packaging shine with silver foil accents. From labels to boxes, the addition of silver foil can elevate your packaging design and create a premium and luxurious feel.
- Art and Craft Projects: Use silver foil to add texture, shine, and dimension to your art and craft projects. Whether it’s collage, mixed media, or paper quilling, silver foil can be a versatile and exciting material to work with.
- Scrapbooking: Add a touch of glamour to your scrapbook pages by incorporating silver foil elements. Cut out shapes, borders, or frames from silver foil, and use them to highlight your photos and mementos.
Innovative Applications of Silver Foil
In addition to traditional design ideas, there are many innovative applications of silver foil that can take your projects to the next level. Here are a few examples:
- Foil Embossing: Combine silver foil with embossing techniques to create stunning raised designs on your white paper projects. The combination of the metallic shine and the tactile texture will add depth and visual interest.
- Layered Effects: Experiment with layering silver foil on top of other materials or colors to create unique visual effects. Whether it’s layering silver foil on colored paper or printing silver foil on textured surfaces, the contrast and interplay of materials will create visually captivating results.
- Negative Space Designs: Instead of adding silver foil to specific elements, try creating designs by leaving areas of the white paper uncovered. This negative space design allows the silver foil to shine through, creating an elegant and minimalist look.
- Watercolor and Silver Foil: Combine the ethereal beauty of watercolor with the reflective properties of silver foil. Apply watercolor washes to your white paper and selectively add silver foil accents to create a harmonious and captivating composition.
- Typography and Calligraphy: Use silver foil to enhance typography and calligraphy designs. Whether it’s adding flourishes, highlights, or metallic borders, the silver foil will make your lettering truly eye-catching.
Incorporating Silver Foil for Visual Appeal
When incorporating silver foil on white paper, it’s important to consider some tips to ensure optimal visual appeal. Here are a few guidelines to keep in mind:
- Contrast: Use the contrast between silver foil and white paper to create a visually striking effect. The shimmering silver against the clean white background will make the foil accents stand out.
- Balance: Incorporate silver foil strategically to maintain a sense of balance in your design. Avoid overusing the foil, as it can overwhelm the overall composition. Instead, use it sparingly to highlight key elements and create focal points.
- Complementary Colors: Consider pairing silver foil with complementary colors to create a harmonious color scheme. For example, use silver foil with shades of blue or purple for a cool and sophisticated look, or pair it with warm hues like rose gold or copper for a rich and inviting feel.
- Texture and Detail: Take advantage of the reflective nature of silver foil to enhance the texture and detail in your designs. Use the foil to highlight intricate patterns, textures, or fine lines, adding depth and visual interest to your projects.
By incorporating silver foil on white paper, you can elevate your design projects to new heights. Whether you’re creating wedding invitations, greeting cards, or art prints, the shimmering effect of silver foil will add a touch of elegance and sophistication. Experiment with different techniques and ideas to unleash your creativity and make your projects truly unique and memorable.
In the next section, we will explore the techniques and tips for working with silver foil on white paper, providing you with the essential knowledge to achieve the best results in your projects.
FAQs about Silver Foil on White Paper
What is the process of applying silver foil to white paper?
To apply silver foil to white paper, you use a hot stamping press and custom metal die to create a luxurious metallic finish.
What are the benefits of using silver foil on white paper?
Using silver foil on white paper gives a more authentic metallic look compared to metallic inks and adds depth and dimension to designs.
How does silver foil differ from metallic inks when used on white paper?
Silver foil has a more pronounced and reflective appearance compared to metallic inks, which may vary in shine and consistency on different paper types.
What tools and materials are essential for working with silver foil on white paper?
To work with silver foil on white paper, you will need high-quality silver foil, adhesive, a heat source, custom-made dies, white paper, cutting tools, and a clean cloth or brush.
What are some tips for achieving the best results when using silver foil on white paper?
To achieve the best results with silver foil on white paper, it’s essential to test and practice, control heat and pressure, use the right paper, avoid overlapping foil, clean the dies, and practice patience.
In conclusion, we’ve explored silver foil on white paper techniques, uses, and design. Elevate your projects with silver foil’s elegance and creativity. Innovate your craft effortlessly.